I started my RowCruiser project with the two initial requirements. I wanted to be able to:
1) transport it on top of my Tundra, and
2) store it on the roof of my garage.
So, before I even ordered wood and epoxy I started with those two problems. Once they were solved I moved roward with the project. I'm pretty happy with the results and I thought I should share them with y'all.
p.s. you can follow my step-by-step build log here: https://angusrowboats.com/community/xenforum/topic/146934/rowcruiser-in-utah
My entire system revolves around this goofy gizmo. Let's call it the chassis:
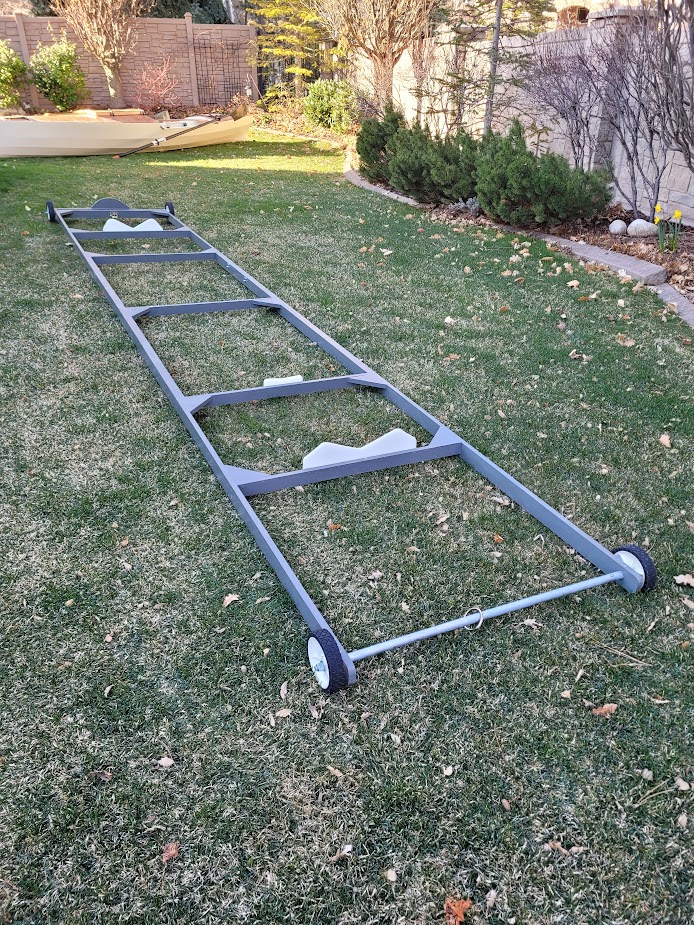
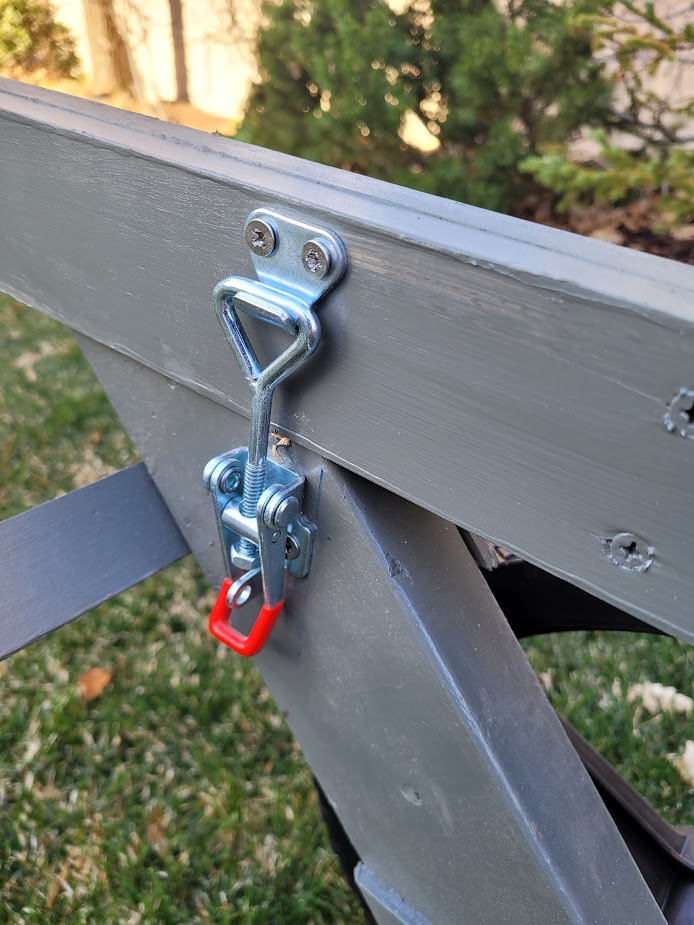
There is a set of wheels that are quickly added and removed with four simple latches.


The positioning of the wheels makes it easy to roll the boat around with little effort.
Here's the RowCruiser on the chassis, where it remains at all times except when afloat. The chassis doubles as a launch ramp dolly, and the boat remains on it from storage to transport to launch.

The whole boat/chassis combo is lifted onto my vehicle with a DC winch, and up to the roof of my garage with an AC winch. No lifting is required for either operation.


Once it's lifted into place, the temporary wheels are removed and a second set of straps (not shown here) is added for extra security. You never know when an earthquake is gonna want to make your boat drop onto your cars!). It looks low, but it's a 10-foot garage and there's ample room to walk under it.
Before I lower it for the next trip, I will click the wheels back into place.
Here are some details about the process.
The garage winch is designed for lifting roof tents off Jeeps. It is a product made by my across-the-street neighbor's family company. The great thing about it is that it has two cables, so you can lift evenly from the front and back ends.


Everything is loaded/unloaded with a Harbor Freight BadLands winch plugged into the trailer hitch receiver, with wires that are temporarily clipped onto the vehicle battery.

I built a custom wood roof rack with rollers that slides right under my Yakima rack bars, with a pully that sits directly above the winch to accomadate the cable...

The cable runs up through the pulley and then back down, undermeath the handlebar at the front of the chassis...

...back through a block at the rear of the chassis...
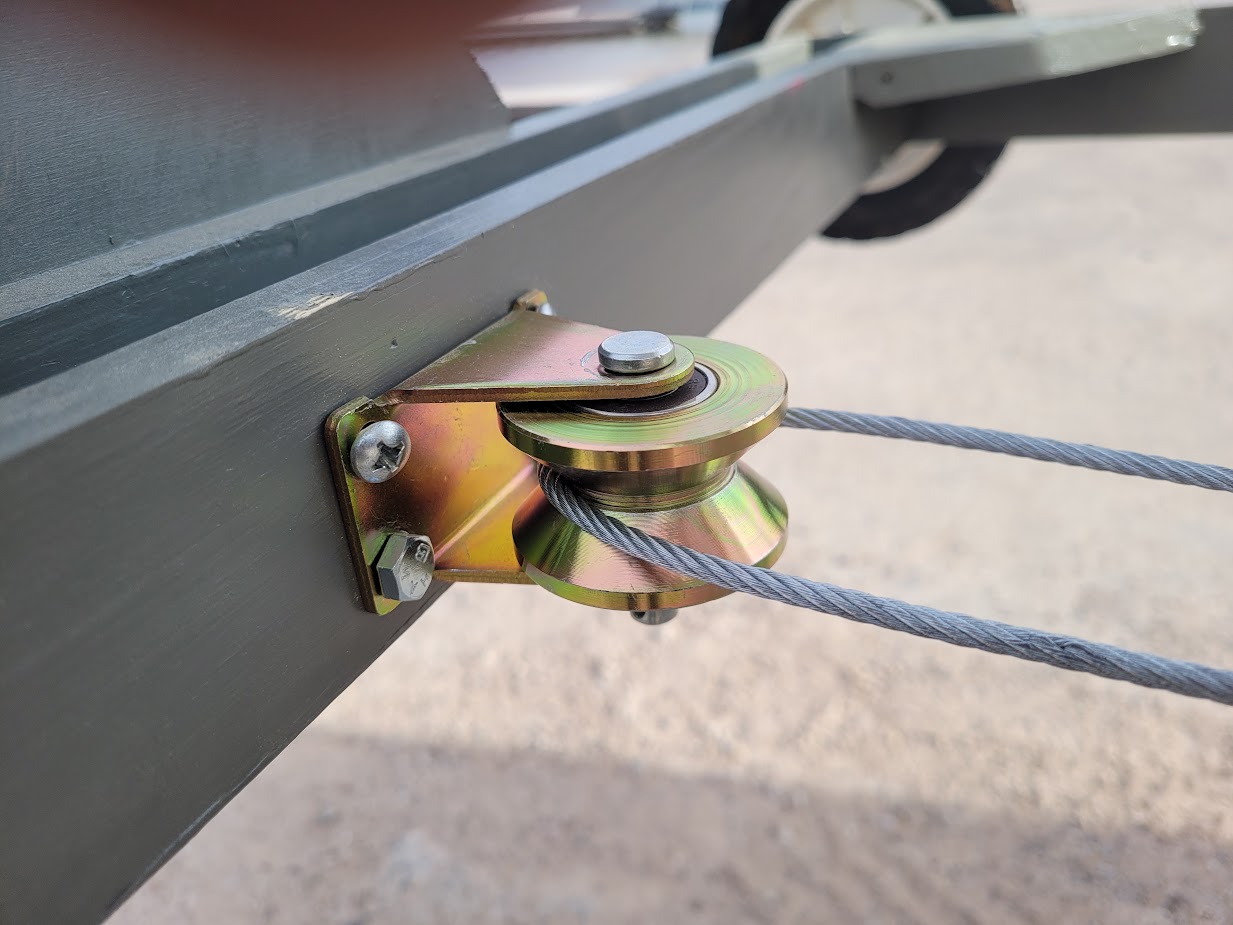
...and then clips onto a ring that is threaded over the handlebar, seen in first picture above.
To load the boat, I hand wheel it up behind the truck...

...run the cable under the handlebar to the back end and run it through the block (which is easily popped off and back on)...

...then back to the front bar where I clip it into place.
Then I engage the winch to lift the front of the chassis up to the rack. The small wheels at the back allow it to roll forward.

At this point I remove the temporary wheels (even though they have already been removed in the previous picture!).

The small wheels at the front help it roll up onto rollers mounted on the roof rack (the yet-unpainted wood piece is to make sure the chassis doesn't slide off one side).

Then I continue to roll it up onto the roof...

...until it reaches the balance point and I tip it up on with one hand.

Note the two angled pieces of wood that displace some of the load to the bumper during this part of the process. They are placed temporarily just while loading/unloading, but are probably not necessary.
Now the winch pulls it the rest of the way up to the front of the truck.

To unload, I just reverse the process.
Here's one more thing I found to be very useful. I bolted two vynil coated cable loops under the hood, so I can bring them out and tie twin bow lines to them to keep everything in place on the road.

And that's it. It's a pretty big boat for cartopping, but where there's a will there's a way!
I hope all of this makes sense and that it might prove useful, or at least interesting to someone out there. Please let me know if you have any questions.
How I imagine it:

How it really is:
