
I beefed up the interior of the compartment on the starboard side, just aft of the rear bulkhead and added an exterior mounting point for the motor mount. It will be held in place with four 3/8" bolts through the drilled holes visible here.

Assembling the deck panels:

Note to people building the kit: the instructions talk about joining the deck panels with thin strips of plywood that fit into incised channels. My kit had neither the strips or the channels, so I contacted Brandon Davis, the creator of the kit, at Turn Point Design. He told me they had dumped the strip joining method in favor of simply running fiberglass tape along the bottom sides of the seams, so that's what I did.
My last task before affixing the decks was to solve my cabin storage layout. I ended up with a shelf on each side between the bulkhead and knee, beneath which I ran a couple of lines of bungee to create a space for stowing things like water bottles, first aid and hygene kit, etc. Next came two cargo mesh compartments along each side. Then I ran a line of bungee around the perimeter of the forward half of the cabin for keeping loose items like clothing, stuff bags, etc. out of the way. Finally, a closeline around the upper cabin for hanging lanterns, wet socks, what have ya.


Decks are lain...

...trimmed and glassed:


I temporarily clamped the "RowCruiser" panel in place so I could remove it while I layed glass. It seemed easier than trying to work around it.

It's always really scary cutting holes in your boat!

Building the hatches. Believe it or not, this was not an adequate number of clamps for the companionway hatch. It came out a bit wavy. I will probably rebuild it at some point, but it is solid and functional for now.

To get the right curve for the other hatches, I placed risers under the edges and screwed through battens in the centers.

Moving on to rowing components.
Another nailbiting cut into the hull. This time for the bottom of the daggerboard well.

Flipped, sanded and primed. I ran out of primer 80% through, so now I'm twiddling my thumbs waiting for another can to arrive.

I'm excited to be in the final stretch. My goal is to be finished and fitted out by the end or March. Woohoo!
Painted and ready for fitting out. I used Wet Edge brand paint. It gets good reviews, but man, it takes a looooong time to dry. Like a week between coats. I was going to do three coats but settled for two because I just couldn't wait that long. For the natural decks I tried something new. Minwax helmsman's varnish in a spray can. I'm pretty pleased with the results. It takes about 10 coats but they dry very quickly.

I don't care for the straps in the plans, so I tried something completely different for the aft hatch cover.

Rowing rig and cockpit hatches installed (more on outrigger details later).

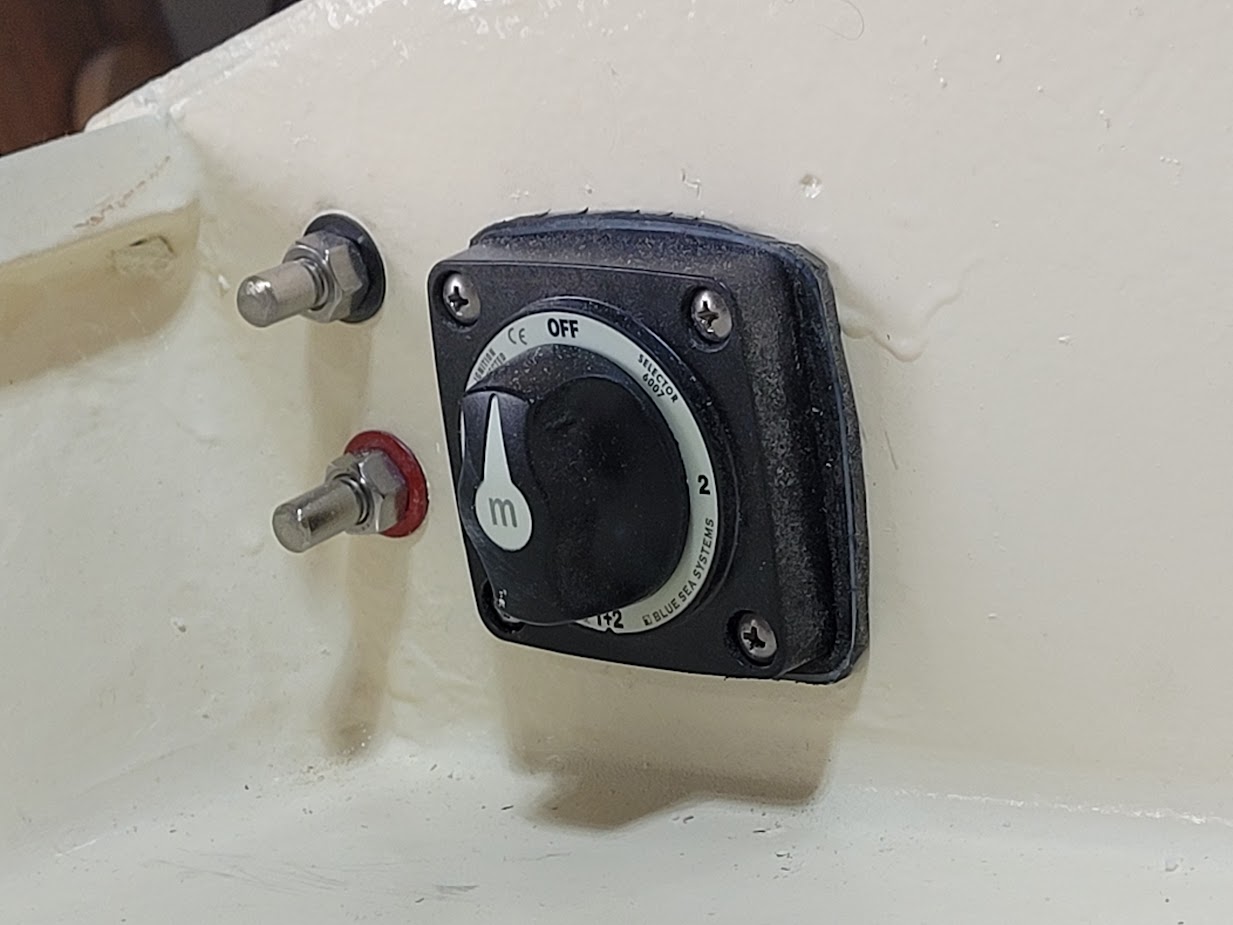
I installed battery terminals and a four-way battery switch (off, batt1, batt2, both) for experimenting with electric propulsion.
I added a window to my washboard.

The hinges are motion resistant, so they will hold any angle:

Latches on the interior allow me to lock it down tight:

Forward hatch and bow hardware:

As I said before, I don't really care for the straps used in the original design to secure hatches. I was going to do a standard sailboat-style sliding hatch, but the instructions explained why that isn't a great idea for a boat with low freeboard. So I came up with a sort of hybrid idea. It's kinda wacky, so bear with me.

I used the same rubber latches that I employed on the aft hatch to hold it down tight when closed. The lid is still loose when the latches are undone and can be completely removed. To open it, I slide it most of the way forward and reuse the aftmost latches to secure the back of the lid.

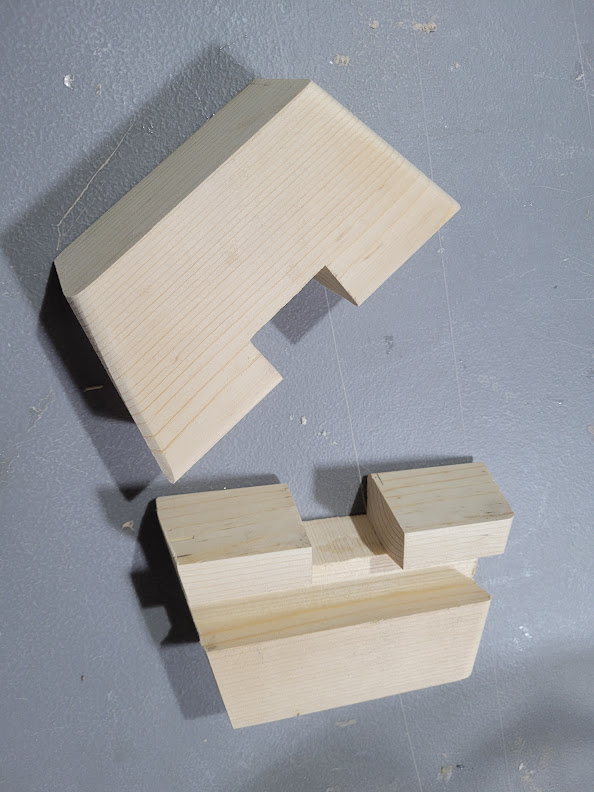
Protrusions at the forward end notch nto this overhang to hold the front down from being blown off by a breeze.

Then notches in the aft end drop over the opening edges and the latches are secured.
Closed:

Open:

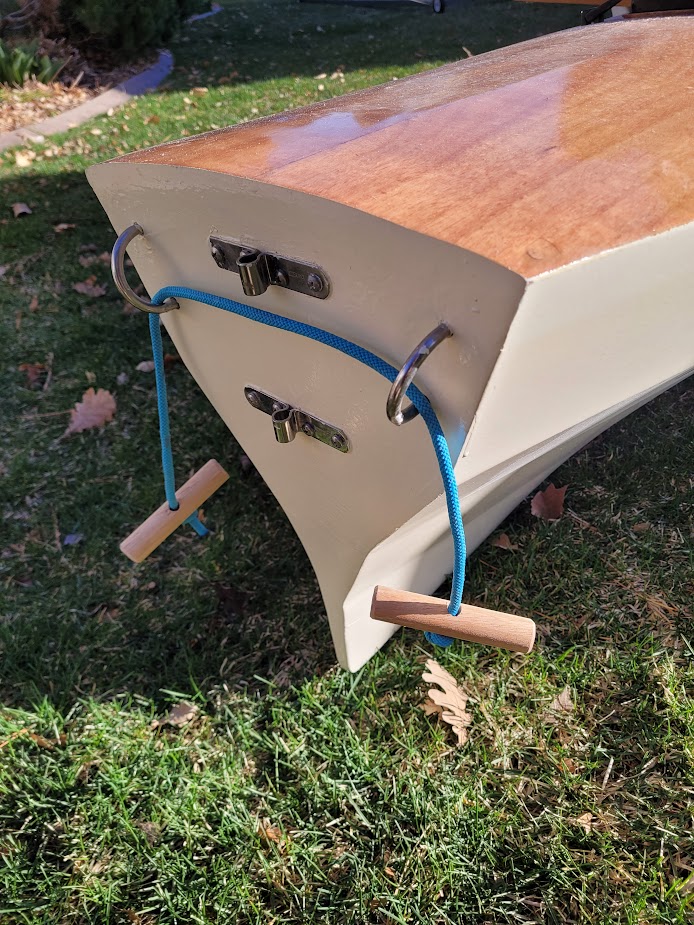
The U bolts on the transom are general purpose attach points for cartopping and two-line shoreline walking. It's also a convenient place to thread a pair of handles through for moving the boat around.
I took a clue from Marty Loken and added oarlocks to the forward cockpit bulkhead for stowing the oars while at anchor.


