Expedition - Upper Longitudinal Stringer


  • Hello,

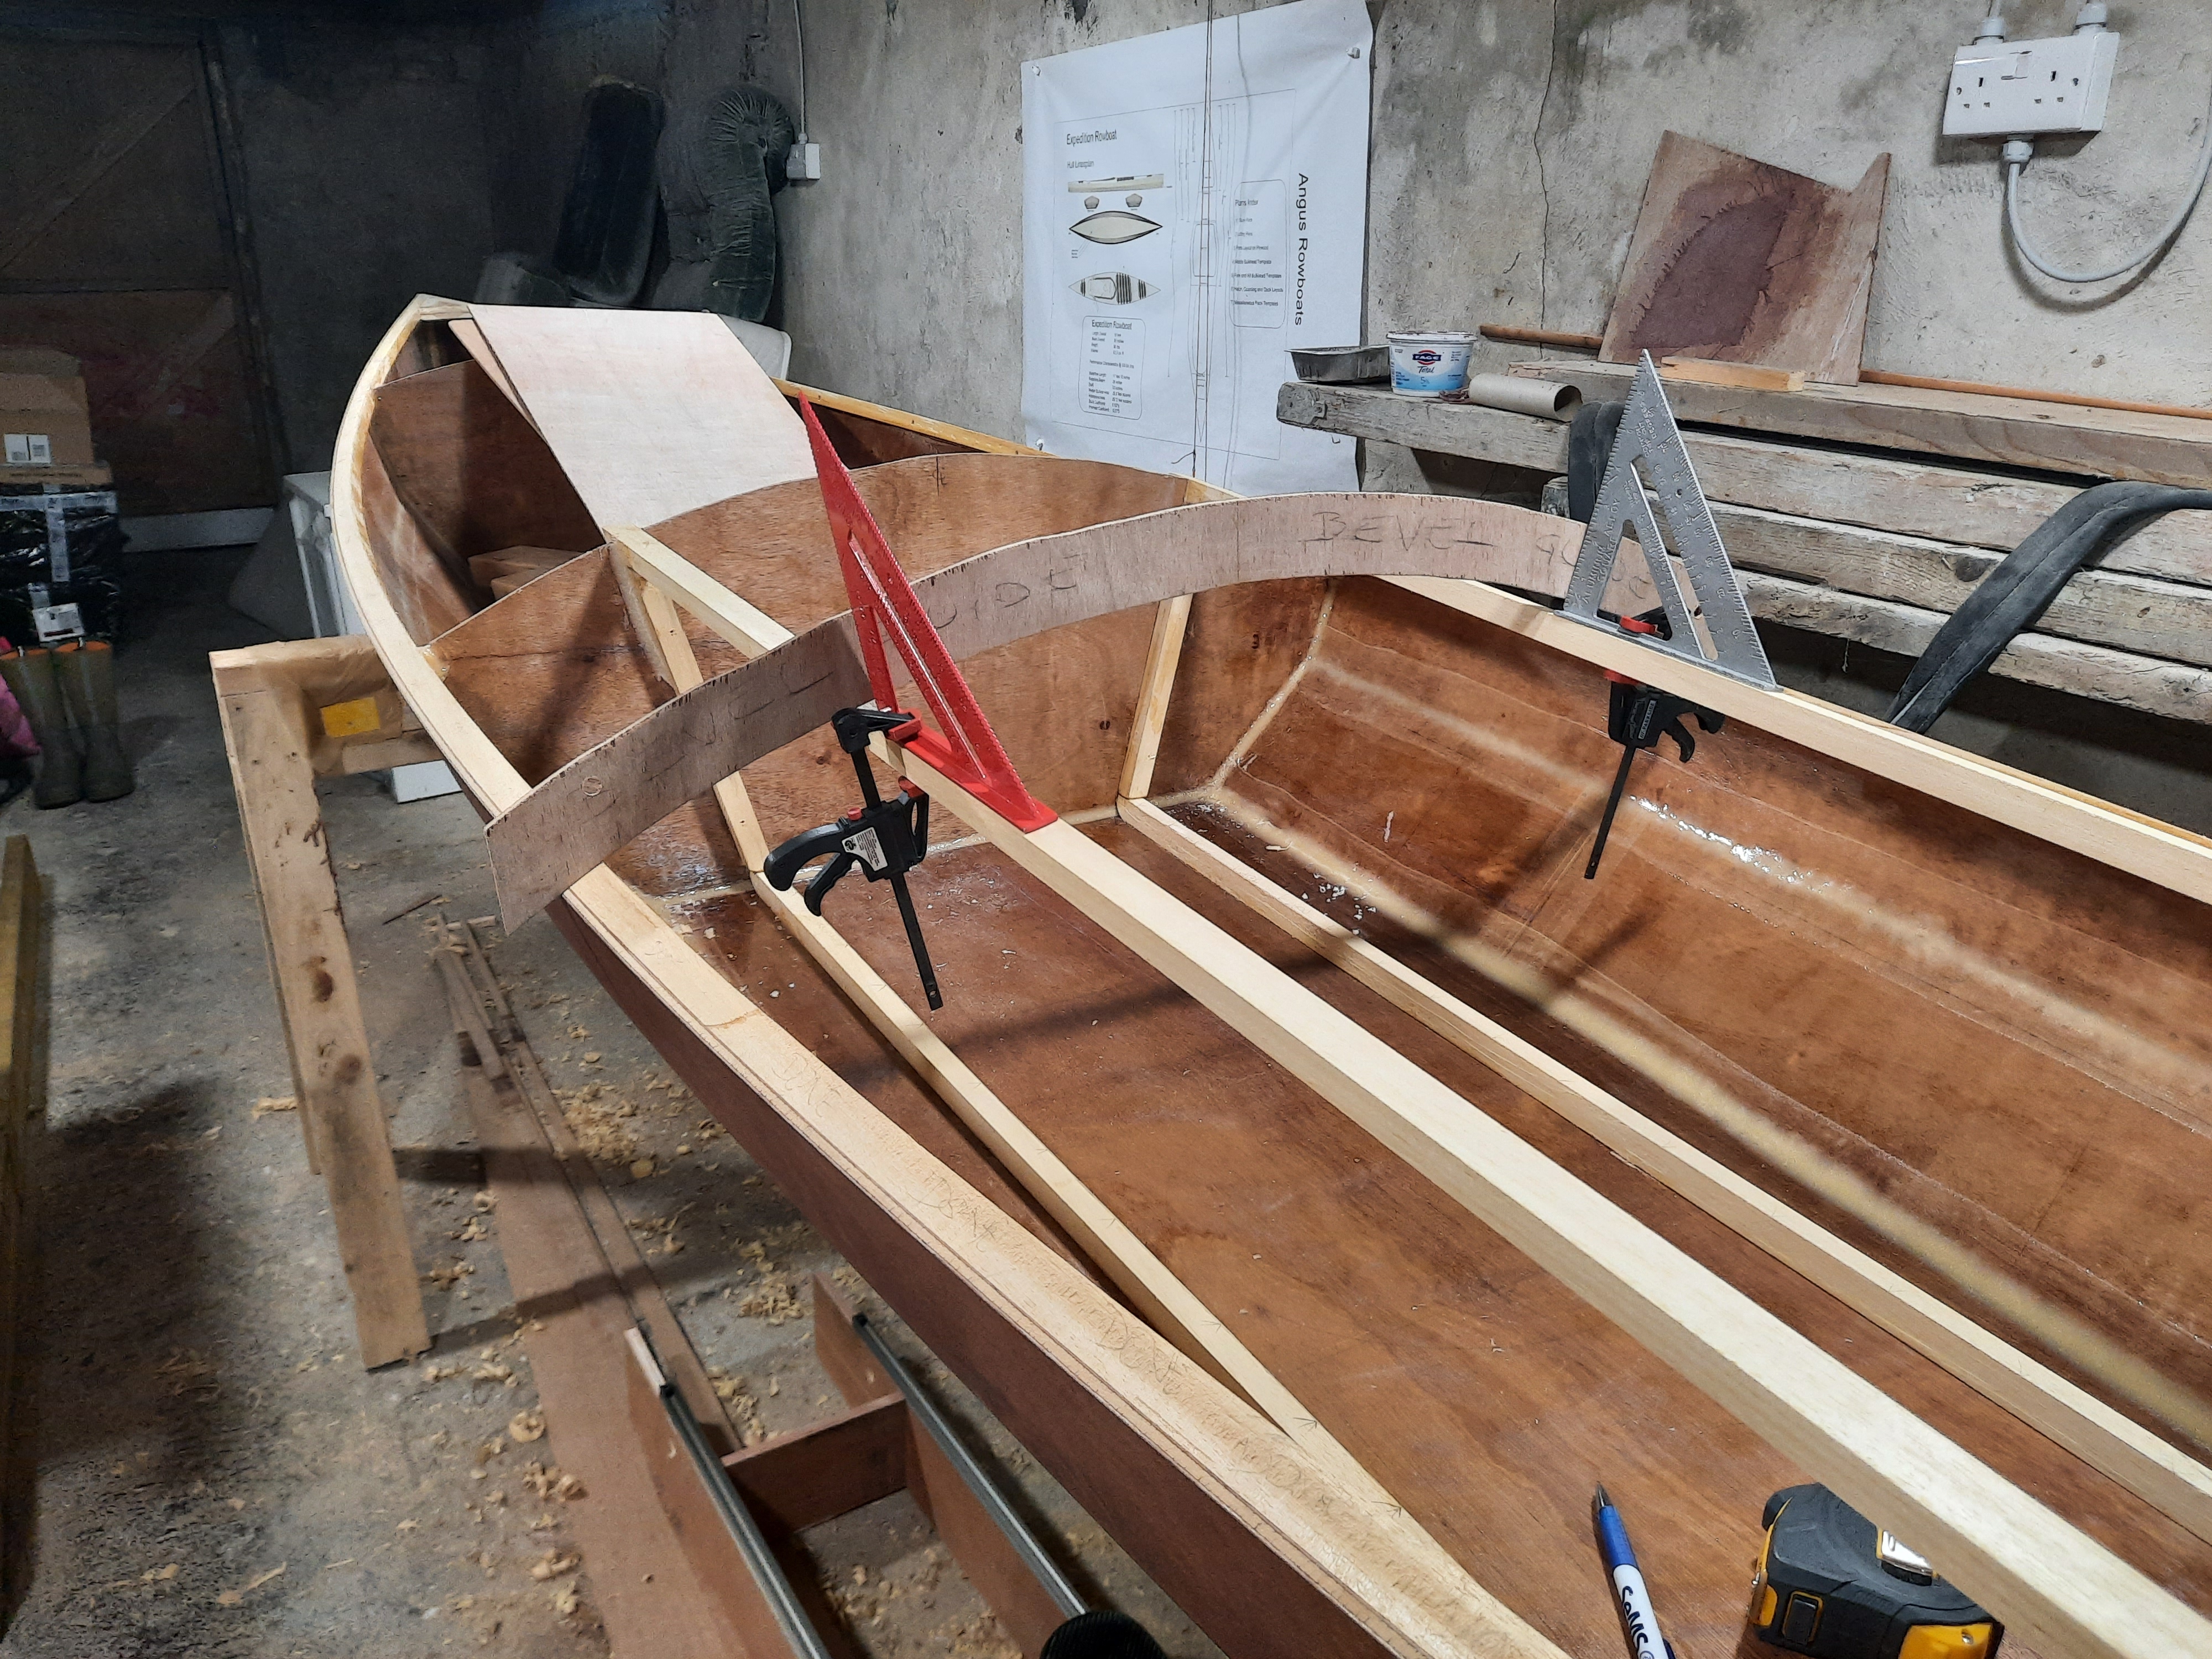
    The upper longitudinal stringers are now epoxied in place. The cockpit panels are not fixed in place.

    The strangers where examined using the Bevel Guide at Bulkhead 2 and Bulkhead 3 all gaps are acceptable (<3mm). However between the two Bulkheads the gap increases significantly (~10mm).

    Question 1 - should the stringers be bent to follow the curves indicated by the Bevel Guide, or shouldthey be straight from one Bulkhead notch to the other?

    Please and thank you,

    Tony.


  • Hello Tony,

    The cockpit stringers don't need to bend to conform to the shape created by the guide.  After they are bonded to the deck, there will still be plenty of flex allowing them to move up and down.  It is when the side panels are bonded in position that their shape will become fixed.   The most important thing is that they don't protrude proud of the bulkheads at the ends, so when the deck is laid, it sits flush to the bulkhead.  


  • Hello Colin.

    Thanks for the prompt reply.

    I still haven't got this straight in my head. I'll list out my thinking below and hopefully you'll be able to spot where I'm going wrong and steer me appropriately. 

    For simplicity I'll outline one side only.

    I'm at the point where all four elements of the port stringer are epoxied in place. The Lower, the Forward and the Rear stringers are fixed throughout their entire lengths. The Upper stringer is fixed at one end to bulkhead 2, and at the other end to Bulkhead 3, and like you say above there is flex for it's middle section to move up and down.

    Now I'll list what I expect will happen next.

    1 - I'll epoxy in the side panel. I have tailored this to fit nicely along its bottom edge, and it's forward and read edges too. It is left too long along the top edge, the intent is I will trim this when the epoxy sets to get an exact fit.

    2 - while clamping the side panel on place I'll ensure the Upper stringer is straight as an arrow (flowery language here but I hope you'll get the point).

    3 - when epoxy sets  I'll trim off excess side panel from above the Upper stringer to make the top edge straight and clean.

    4 - I then move on to fixing the deck in place. I prepare all the associated bonging surfaces on the hull.

    5 - (I'm building from plans, not kit). I take a sheet of material and sculpt it over the curves of Bulkhead 2 and 3. And fix it along the sheer clamps with copper nails or screws.

    6 - when epoxy sets I'll use my jigsaw to cut out the ope for the cockpit.

    7 - at this point I expect to see a significant gap (~10mm), between the upper edge of the side panel and the under surface of the deck. This gap is the crux of my issue.

    Colin, I hope this list illustrates my [mis]understanding of the next few steps of my build, and that you can find what needs to be corrected. 

    To avoid clouding the issue I have omitted details like the wet epoxy on the underside,  and the initial tough cut of the cockpit ope, etc

    Thanks for the time you have already given to this.

    Kind regards,

    Tony


  • Okay, I think I get what you're saying (very nice clear description by the way).  I just read through the manual to refamiliarize with the process (and, by the way, my earlier comment was slightly incorrect - I thought the decks went on before the side panels).  So, the issue is the stringers do not continue on the same plane that the deck will be taking, but instead, start nosing down a few degrees.  So, your concern is that with the plywood maintaining the same plane, it will start rising above the stringers.  While the plywood should be able to conform (it can be bent slighly in two directions albeit tortured), the problem is that the second curve would be not so much of a curve but an obtuse angle at one point.  I would say the solution would be to give your stringer a slight upward curve, so the change in plane is curved.  When bonding the stringer to the side panels, if you have a flexible batten of sorts (a long piece of relatively thin wood?), you can use this as a guide/support to ensure an even curve.  Let me know if that makes sense to you (and if I'm even grasping the problem accurately).


  • Hello Colin,

    I think you are grasping the problem. I agree that I have to give my stringer a slight upwards curve.

    I've a mitigation: I will make two faux-side-panels, and fix them in position with small woodscrews (no epoxy!). So at a later stage, when the deck is fixed in place, I can unscrew the faux-panels. Then push the Upper stringer into a more optimum position and fix (epoxy) it there. Then taylor the upper edge of the actual side panel for a snug fit.

    Also, I have an idea that will gather more information: At an appropriate point in the steps outlined above, I will place a camera inside the cockpit, recording video, and then dry fit the deck, just bending it into shape by hand and holding it there for a minute.

    A review of the footage will reveal if the actual dimensions of this worrisome gap.

    This actual dimension will inform decisions about next steps. In particular, now much upward curve is needed in the stringer.

    With these two techniques I'm confident about getting back to the workshop to move the build  process along.

    Thanks again Colin for all the discussions and ideas.

    Kind regards, 

    Tony 


  • Hello Colin,

    Short version update: it's a non-issue, the gap is <3mm

    Long version update: my arms were too short  and too few, to hold the deck in place while the camera was recording. So I used screws to temporarily fix the deck in place. Then I cut an 8-inch diameter hole in the sheet of plywood (where the cockpit will be). Via this I took photos of the gap. Comparing the gap to the nib of a pen shows it is <3mm. Hence this is a non-issue.

    Thanks for all your help and apologies for kicking off a carfuffle.

    Kind regards, 

    Tony


  • Hey Tony.  That's great to hear, and I'm glad it seems to be working out in the end.  And no need to apologize - it's kind of fun bringing alive the various build proecesses in my mind.  I forget how everything goes together with time, so it's a good way for me to stay fresh with the various steps.  Good luck with the rest of the build.


  • Tony - thank you for posting this!  I'm at this point and had the same question.


  • @Kelle Snodgrass You're very welcome Kelle. I got great joy to see my boat with its deck fitted, it felt like a big step forward. I hope for the same for you too.   T.


Please login to reply this topic!